Tuesday, 5 February 2013

Valentine Seed Hearts

I learned about seed bombs on David Suzuki's Queen of Green site. They are little seed balls made from clay, compost and seeds that can be tossed anywhere you would like flowers to blossom. There is no need to plant or water. They contain everything inside the ball to give them life as soon as rain and sunlight reach them. 

The Valentine version of them looked so appealing that I had to give them a try. We picked up Air-Dry Clay, compost and a heart shaped cookie cutter. Misha got the wild flower seeds and the beets for the red colouring.

Seed Heart ingredients

We mixed the seeds with the compost.


We added the soil/seed mixture to the clay mix at 5:2:1 (clay/soil/seed) ratio. Misha mashed it by hand until it was an even consistency.


We flattened the clay out on a wax paper just like you would when making a thick pizza crust.


We cut the hearts out with the cookie cutter.


The most fun part was glazing the hearts with the beat juice. We simmered two chopped up beats until we got a beautiful deep red coloured liquid. The glazing was the perfect topping for the hearts. Once glazed we just let them sit for 48 hours to air dry.


Here they are, our Valentine Seed Hearts. They are ready to be given away and blossom into beautiful wild flowers in the spring.

Valentine Seed Hearts

The best part is that you can give them away for any occasion, at any time of the year. As soon as the weather permits, they can be tossed in the garden and watch for flowers to grow. We will keep one for our garden just to see how they turn out.

Mia

Sunday, 3 February 2013

Backyard Bird Feeder

We get really excited about birds in our backyard. We started feeding them in the fall and winter to supplement their diet. It took a few months for them to find the bird feeder but when they did we were rewarded with more visitors than we could have imagined.  We love watching them and hearing their songs and calls.

The daily visits of the birds are usually initiated by the sparrows. They often sit and watch in the nearby apple tree or forsythia to check out if the coast is clear before heading for the feeders.

Solitary Sparrow

Then they happily flock to the feeder....

Soaring Sparrow

... and often have to jockey for position on the perch.

Do you have a reservation?

After the sparrows the male Northern Cardinal usually arrives. His beautiful, bright red feathers seem so exotic; like something that should be in a tropical rain forest.

Male Northern Cardinal

The female is never far behind and although not as colourful, she is exotic in her own way.  A pair has been making a nest in this apple tree the last two summers.


Cardinals usually bond for several years or for life. We have seen as many as 5 pairs in the backyard at the same time.


The Dark-eyed Junco is an infrequent visitor but one of my favourites.  Here's the male...

Male Dark-eyed Junco
... and the female.  They seem to bond in pairs as well.


While our neighbour keeps hobby pigeons in his backyard, we are regularly visited by their relatives, the Morning Doves.  They don't come often but when they do they make sure we hear them. Their cooing is soothing and relaxing and we can hear them from inside the house.

Morning Dove

Mia's favourite is the tiny Red-Breasted Nuthatch. She loves how delicate it is. She had a hard time getting a picture of them as they move incredibly fast, never resting in one spot long.

Red-breasted Nuthatch

The friendly chickadees visit daily in a small flock but don't stay at the feeder long. They pick up a seed and take it to a nearby tree to crack and eat it; then they return for another one.  We love their chick-a-dee-dee-dee, song!

Chickadee

Surprisingly, we have only seen this one European Starling at the feeders. We did see a flock at the local big box mall hanging around the restaurants.  Perhaps they offer a more sophisticated menu than we do.

European Starling

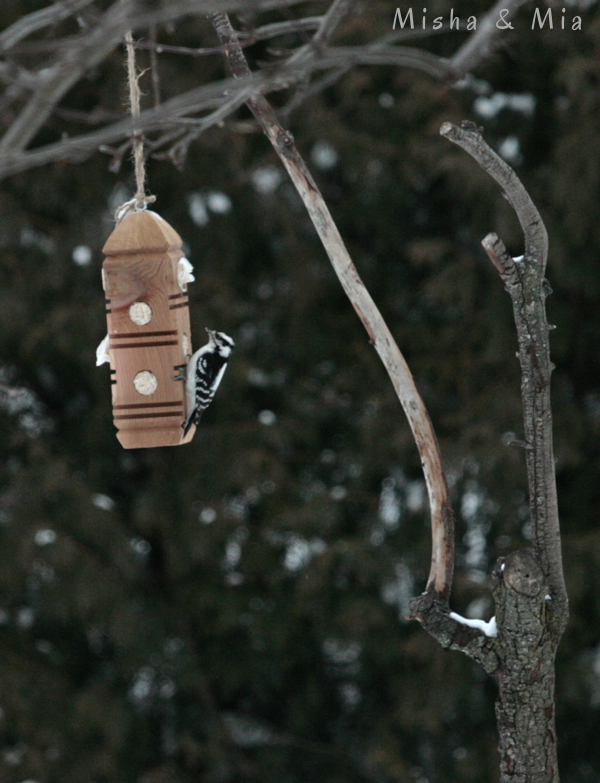
We weren't sure if the woodpecker feeder would attract any customers but this female Downy Woodpecker found it the first day it was up.

Female Downy Woodpecker

The Blue Jay only visited twice when we were around and this is the closest he came to the feeder when we had the camera.  It's incredible how big Blue Jays are; 2 - 3 times the size of the cardinals.


And last, but not least we spotted this beautiful Cooper's Hawk; twice. The first time I ran to get my camera and in the meantime it had swooped down, picked up a mouse and flew off. I missed the action but Mia saw the whole thing from the bathroom window.  I had to endure the whole "you don't have to photograph everything and sometimes you just have to enjoy the moment live" lecture.  When it showed up the second time we got the shot and Mia had to endure my surfer philosophy sermon, "there is always another wave". 

Cooper's Hawk


We hope that some of these birds will hang around to eat garden pests in the spring and summer. To encourage year round bird visitors creating habitat for them in addition to supplementing their food source is important.

We were lucky to start with a row of white cedars, some deciduous trees, a big forsythia bush and a couple of apple trees.  We added a twig wall, more cedars, wildflower gardens and a native plant garden in the front. The only thing we don't have yet is an open water source but I'm still working on Mia to let me build a small pond at the back. We'll see how that goes.  I may have to settle for a bird bath.

Misha

Sunday, 13 January 2013

The eco-friendly, green kitchen REVEAL!!!!

We are finally done! The kitchen is completely finished except for some DIY blinds but they can wait.

We love our new kitchen. We really enjoy the extra counter space we gained and being able to cook at the same time. I am not a big fan of open concept, but I must admit that by removing the wall between the kitchen and the living room the space just filled up with light. It's so pleasant. There is nothing comparable to the morning sun shining through your kitchen while making breakfast. Here are the before and after pics.

Before

After

Before
After
Before
After - cabinet extended 
Before

After
Before - kitchen as an enclosed room
After - wall removed and open concept created
After - the view from the living room
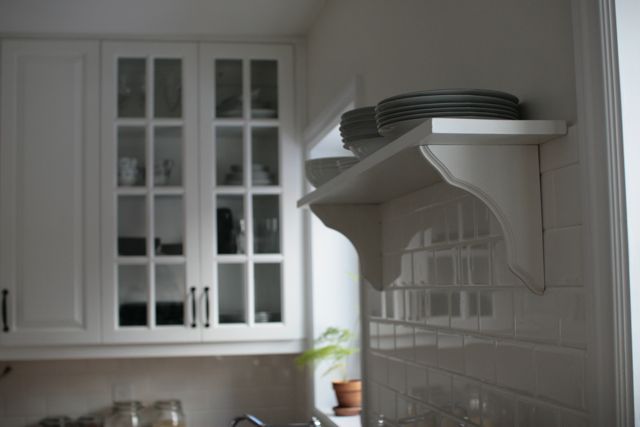
Newly installed shelf by Misha


 Here is a list of the green renovation products that we have used and where we got them from:
  1. DRYWALL - CertainTeed Easi-Lite™ Lightweight Gypsum GreenGuard Certified. Purchased from Rona. Read about it HERE
  2. ULTRATOUCH COTTON INSULATION- Used as a wall insulator. Purchased from Eco Building Resource. Read about it HERE
  3. FORMALDEHYDE-FREE CABINETS - Custom made using PureBond plywood from Columbia Forest Products. Read about it HERE
  4. IKEA NUMERAR OAK COUNTERTOP - Purchased from IKEA. Finished with natural walnut oil. Oil purchased from the Big Carrot. Read about it HERE
  5. LOW VOC PAINT - Used for the wall and cabinets. Purchased from Homestead House. Read about it HERE
  6. ALUMINIUM WINDOWS - Made by Aluminum Window Designs. Installed by Encore. Read about it HERE
  7. DURAFOAM 0-VOC SPRAY FOAM INSULATION- Used for sealing the windows. Purchased from Eco Building Resource.
  8. LOW VOC CAULKING - Used for sealing the windows. Supplied by Encore.
  9. LOW VOC GLUE - Used for gluing down the cement boards. Purchased from Home Depot. Read about it HERE

Lessons learned:
  • Be vocal about your green priorities and don't be afraid of micromanaging the work. We found that contractors in general are unfamiliar with using green products and they tend to default to products they know.
  • Avoid renovating during the summer. It's renovation season and it's challenging to book a good tradesman for smaller jobs. We had contractors not even returning our calls.
  • Be prepared to spend time researching and sourcing green renovation products. While they do exist, local options are still challenging to find. 

The best part of our renovation is that we are experiencing no off-gassing or ill effects from any part of the work. We rest easy knowing we did everything that we could to make our house a safe and healthy home. It is totally worth the time and effort to use healthy, green alternatives.


Mia


Wednesday, 9 January 2013

Kitchen shelf installation

The kitchen reno is almost done but we were still struggling with what to do with the blank wall above the stove.


Convention would have us install a range hood over the stove but after considering two styles we took a long hard look at whether we really needed one. We realized that we never used our old range hood and that we could vent with our recently installed casement windows. It would also feel more natural, be environmentally friendly and save electricity.

The wall over the stove still needed something and Mia came up with the idea of installing a shelf. We found oak brackets at Lowe’s that would add to the country look of our kitchen and also picked up a nice piece of pine. Our contractor was long gone so it fell to me (the not so handy man) to install the shelf.

We measured and marked the drill holes on masking tape then wet the masking tape. The wet tape helps prevent the drill bit from sliding around on the tile.


I used a ceramic drill bit to get through the tile and not crack it. 


I inserted the plug into the hole then the screw into the plug. 


The bracket has a slot that slides over the screw head and then gravity and the weight of the shelf  holds it in place.  It took a little bit of trial and error to get the correct screw depth until the brackets fit snugly.


I put the shelf in place and secured it with a couple finishing nails and easy peasy, it’s done! Mia was very impressed by my skilled work.


This was the last piece of the puzzle and our kitchen renovation is officially finished. It's time to take some pictures for you to see the final look.

Misha

Sunday, 6 January 2013

DIY Duct Work

We are getting close to being done with our kitchen reno and ready for the big reveal.  This duct work was a last minute job that was overlooked by us and the contractor. The job fell to me (the not so handy man) to get done.  We are extending our cabinets in the new kitchen design and they will cover the only heat register in the kitchen.


We needed a solution quickly. I did an internet crash course on vent and duct work and picked the brains of the staff at Rona to get the information I needed to get the job done.  I contacted our cabinet maker to determine that a 4 inch diameter flexible duct would fit under the cabinets.  I purchased a register boot to fit the vent hole and divert the air towards the “kick” of the cabinet.  I inserted the register boot then attached the flexible duct and cut it to length with a hack saw. 


I then sealed around the boot and the flex-duct joint with metallic duct tape.

I had to order a 2 ½” x 10” white register with a round 4” inflow from an H & V supply store to fit on the cabinet kick.  We picked up the register the morning that the cabinets were coming.  I wasn’t sure if everything would come together in time; I didn’t want to hold up the cabinet installation as our cabinet maker was coming from Guelph, Ont.  We put the register in the hole cut into the kick, attached it to the flex-duct, sealed it with tape then put the kick into place by compressing the flex pipe.  It took a little finessing but was not too hard.  The finished look is great.


Not bad for a rookie ductworker and Mia likes the heat blowing on her feet when she is cutting vegetables on the counter.

Misha